
The Retail Server is a wrapper over commerce runtime. Retail Server uses a web API and OData to support thin clients both in the store and online on tablets and phones. The commerce runtime communicates with Retail Headquarters through Commerce Data Exchange services.
Retail Server supports Service to Service authentication which makes it possible to have services capable of communicating with Retail Server without a need of a user in front of a screen to provide credentials at some point in time. This enables scenarios when you need to create processes to periodically contact Retail Server to perform different kind of tasks, for instance, synchronizing customers, orders, publishing products for eCommerce functionality and so on.
To setup the feature the following major steps should be done:
-
Create an application in Azure Active Directory, this application will correspond to your Daemon application - the one which will make calls to Retail Server.
-
Add the application’s details into RS’s authentication white list, this way RS will be able to accept requests coming from that application.
These are described in detail below.
Create Application in Azure Active Directory
Navigate to Portal and select Azure Active Directory
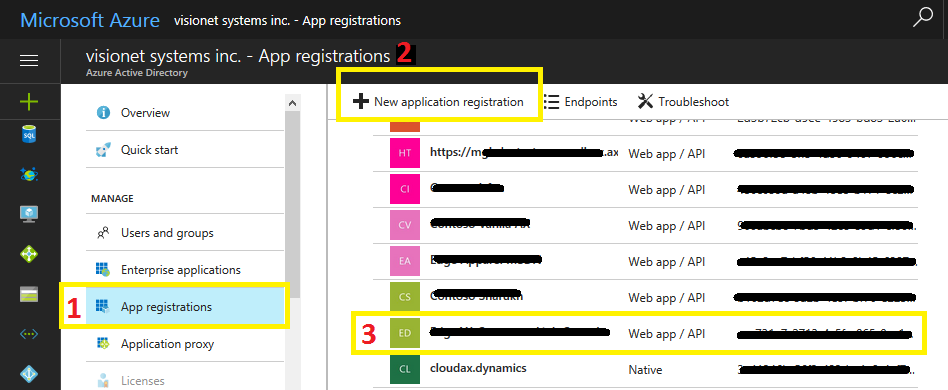
Select App Registrations and Create New Application Registration.
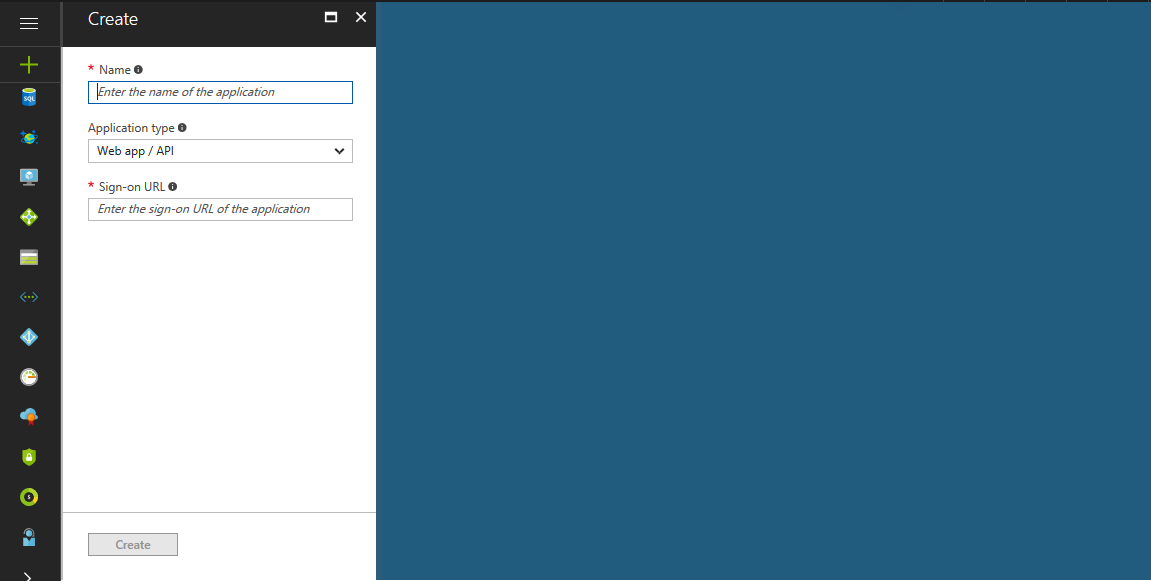
- Enter Name and Url.
- Select Type as Web App / Api.
- Create button
Open the Application created, Copy the application ID and Click Keys.
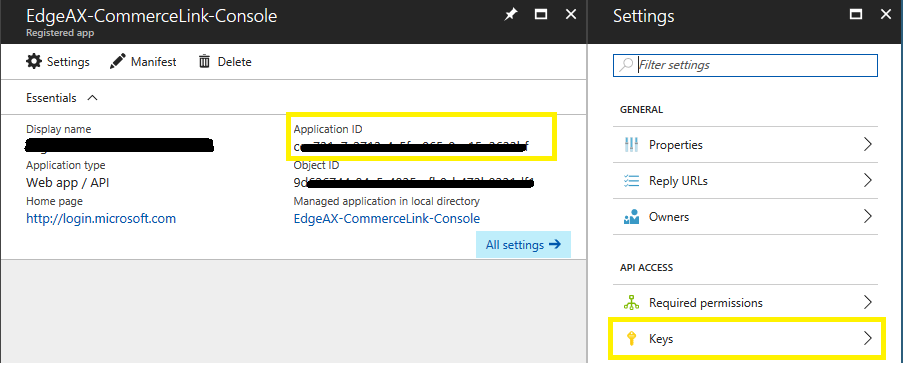
Create New Key ; Make sure you copy the key, as it will show the Key Only Once and keep it hidden and the only way is to get new key (if lost).

Now you have both Application/ Client ID and Client Secret Key which will be further used in application and D365.
Add Application Detail into Retail Server White List
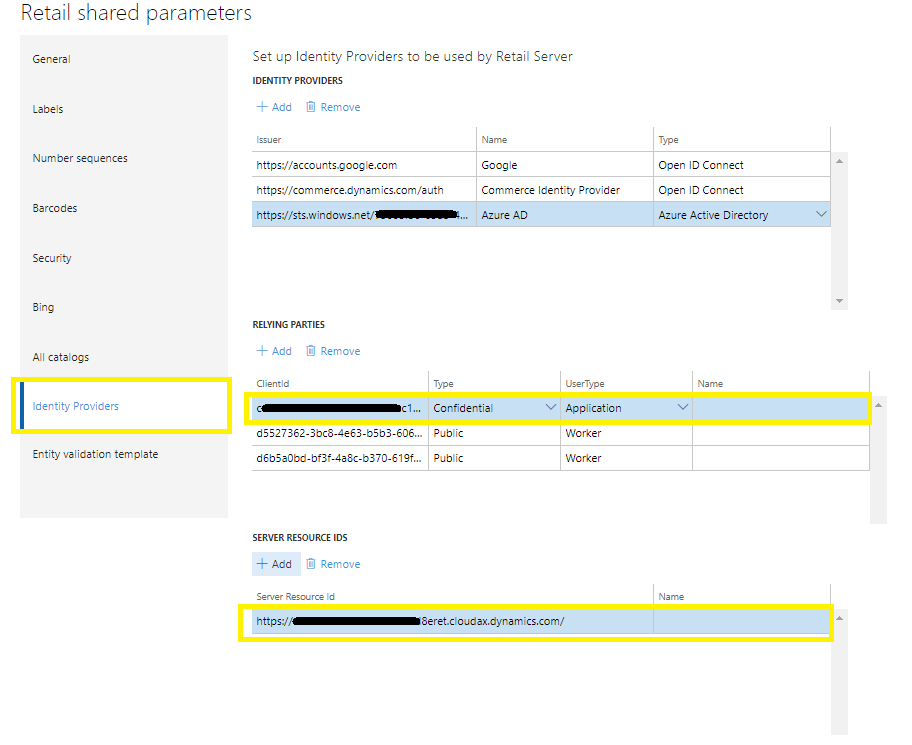
Login to Dynamics 365 ; Open Retail Shared Parameters in D365 from (Retails and Commerce > Headquarters Setup > Parameters)
By default, tenant is already present in “Identity Providers”, if not, you need to add your organization tenant.
Select your tenant and Click Add on “Relying Parties”.
- Enter Client ID
- Select Type as confidential
- Select UserType as Application
Add Retail Server URL in “Server Resource IDS”
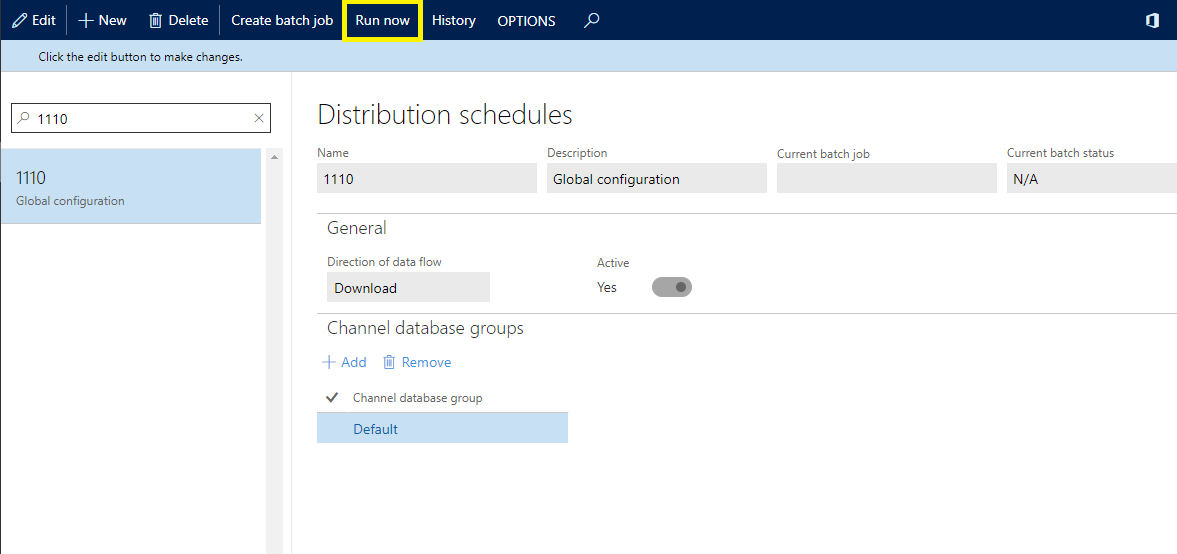
Go to - Retail and Commerce > Retail IT > Distribution Schedule
Run Job 1110 (Global Configuration). Wait until the job finishes its work, then, in addition, if you don’t want to wait until cache expires, and if that is not production environment - you can execute iisreset.
Connect from Code
You need to install nuget package “Microsoft.IdentityModel.Clients.ActiveDirectory” to connect
These are the few terms i would be using to create retail server authenticated context.
-
D365Url : This is the retail server URL of the D365 Example: https://testServerret.cloud.onebox.dynamics.com/
-
retailServerUri : This is the retail Server metadata URL Example: https://testServerret.cloudax.dynamics.com/Commerce/
-
Client_Id : This is the client Id of the application created in azure portal
-
Client_Secret :This is the client secret key of the application created in azure portal
-
Azure_Active_Directory : This is the tenant of the D365. Format: https://sts.windows.net/TENANT_ID ; Example: https://sts.windows.net/7yu653w-65d3-4u96-a135-8ui4ec1672e3/
-
OperatingUnitNumber : Online Store Number
AuthenticationContext authenticationContext = new AuthenticationContext(azureActiveDirectory, false);
AuthenticationResult authResult = null;
authResult = await authenticationContext.AcquireTokenAsync(D365Url, new ClientCredential(clientId, clientSecret));
ClientCredentialsToken clientCredentialsToken = new ClientCredentialsToken(authResult.AccessToken);
RetailServerContext retailServerContext = RetailServerContext.Create(this.retailServerUri, this.operatingUnitNumber, clientCredentialsToken);
return ManagerFactory.Create(retailServerContext);