
Connecting with LinkedIn Rest API is easy once you know how to authorize the user. Following are the steps that can be performed in .NET / Java using HttpClients or simply from JQuery / Javascript.
-
Register Your Application
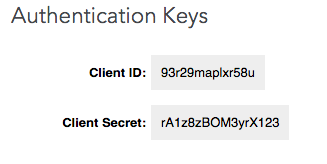
You need to set the scope of your application after registering, by scope means to define which LinkedIn feature your application is going to use. For advance API levels you might need to contact with Linked In order to get permission. Once you save your configuration, your application will be assigned a unique "Client ID" (otherwise known as Consumer Key or API key) and "Client Secret" value.
-
Get An Authorization Code
https://www.linkedin.com/uas/oauth2/authorization?response_type=code&client_id=YOUR_APP_CODE&redirect_uri=YOUR_WEBSITE_ENCODED_URL&state=987654321
Parameter Description Required response_type The value of this field should always be: code Yes client_id The "API Key" value generated when you registered your application. Yes redirect_uri The URI your users will be sent back to after authorization.
e.g. https://www.example.com/auth/linkedinYes state A unique string value of your choice that is hard to guess. Used to prevent CSRF.
e.g. state=DCEeFWf45A53sdfKef424Yes scope A URL-encoded, space delimited list of member permissions your application is requesting on behalf of the user. If you do not specify a scope in your call, we will fall back to using the default member permissions you defined in your application configuration.
e.g. scope=r_fullprofile%20r_emailaddress%20w_shareOptional - When Application Is Approved
When the application is approved LinkedIN will redirect to your URL with some information with 2 query string parameters.- Code - OAuth 2 authorization code
- state — A value used to test for possible CSRF attacks.
- error_description - If error is found ( if user pass authorization successfully it doesnt appear in URL )
-
Exchange Authorization Code for a Request Token
Now in this final step you have to send POST request in order to get the request token of that user. Default life of that token is 60 days.
Result will be in JSON providing both the access_token and exprire_in for that user. That token can be saved in your database and can be easily used to view data for that user for the next 60 days if your application have still access to access that user information.https://www.linkedin.com/uas/oauth2/accessToken
-
Getting the user information
You can visit this link in order to get the user information.
Post any question in the comment if you find any problem.